

5 Epoxy resin Mistakes!
Table of Contents
If you’ve ever worked with epoxy resin, you already know it can be both magical and maddening. On a good day, resin transforms into glass-like surfaces, glossy river tables, and stunning art pieces. On a bad day, it stays sticky forever, fills with bubbles, or cracks down the middle like a broken dream.
I’m Hamed Shahsavandi, founder of Epoxy Rescue and author of the Persian bestseller “Profitable Wooden Pieces.” Over the last decade, I’ve trained thousands of students and led more than 200 in-person resin workshops. I’ve seen every possible mistake—sometimes in my own projects, often in my students’.
And here’s the good news: most failures come from just a handful of critical mistakes. If you know what they are, why they happen, and how to rescue them, you can save yourself countless hours of frustration (and wasted resin).
In this guide, I’ll walk you through the 5 most critical epoxy mistakes. For each, you’ll learn:
-
How to recognize the mistake (symptoms).
-
The science behind it (why it happens).
-
Step-by-step rescue methods.
-
Pro tips from real workshops.
By the end, you’ll not only understand how to avoid disaster—you’ll also know how to fix it like a pro when things go wrong.
If you Don’t have enough time to read about Epoxy Resin Mistakes,
Listen to this Podcast:
Epoxy Resin Mistakes #1: Incorrect Mixing Ratios
Symptom: Resin stays soft, tacky, or never hardens.
Why It Happens
Every epoxy system is built on a chemical marriage between resin (epoxide) and hardener (amine). For the bond to work, the ratio must be exact—usually 2:1 or 1:1. Even being off by 5–10% can leave extra unreacted molecules floating around. Result? A project that never cures.
Temperature also plays a sneaky role. In cold conditions, resin gets thick, like honey from the fridge. If you eyeball instead of measuring, you’ll almost always get it wrong.
Real Workshop Story
One of my students once poured a large river table and proudly told me he “eyeballed” the ratio because he didn’t have a scale big enough. After 3 days, the table looked fine… until we touched it. The surface was like chewing gum. We ended up scraping and repouring the entire surface—a 200-dollar mistake.
How to Fix It
-
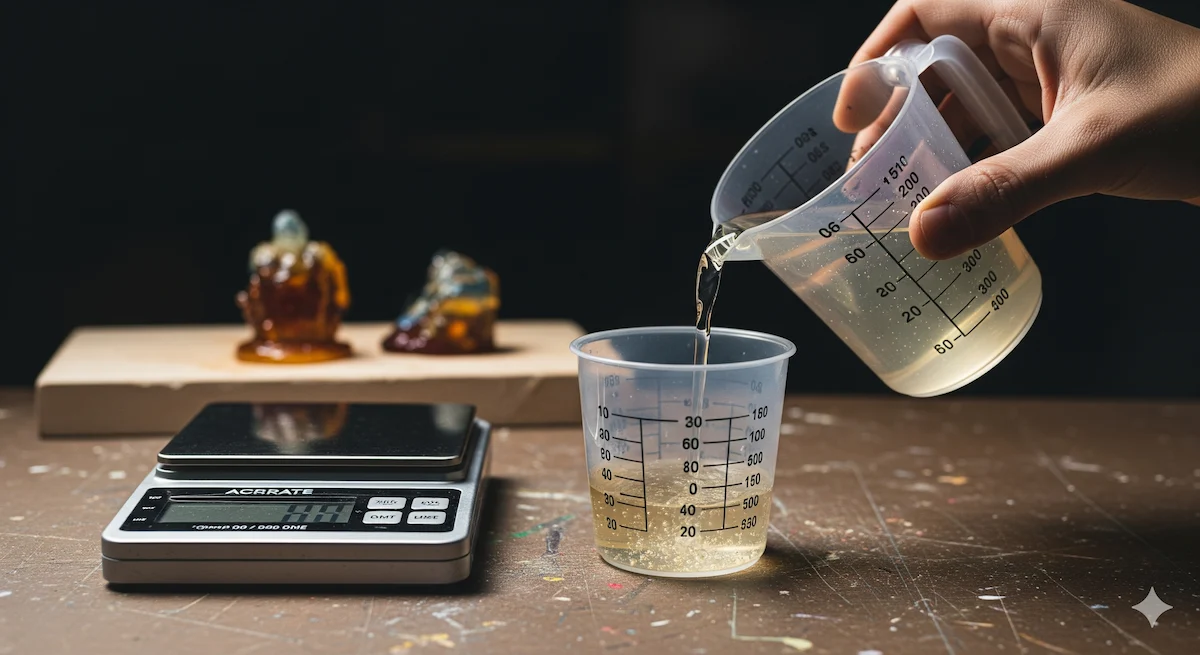
Always measure with a digital scale. Get one accurate to at least ±0.1 g.
-
Mix thoroughly for 3–5 minutes. Scrape the sides and bottom.
-
In cold weather (<20°C / 68°F), warm the bottles in lukewarm water for 10 minutes before mixing.
-
Use the “double cup method”: Mix in one cup, then pour into another clean cup and mix again.
Pro Tips
-
Keep a Mixing Log Sheet: write batch numbers, ratio, mixing time, and temperature.
-
If resin hasn’t hardened after 24h: gently scrape the tacky layer, sand lightly, then recoat with a fresh correct mix.
Epoxy Resin Mistakes #2: Ignoring Temperature & Humidity
Symptom: Epoxy looks cloudy, cures soft, or develops a greasy film on top.
Why It Happens
Epoxy is sensitive to its environment. If it’s too cold, the chemical reaction slows or even stalls. If humidity is too high (>60%), the hardener reacts with moisture, leaving a greasy or waxy film called amine blush.
Critical numbers to remember:
-
Ideal temperature: 22–25°C (72–77°F)
-
Minimum pour temperature: 18°C (64°F)
-
Relative humidity: under 60%
Real Workshop Story
During one winter workshop in Tehran, the heater broke, and the room dropped to about 14°C. Every student’s project cured milky and soft, like jelly. The fix took days of sanding and reheating. After that, I never forgot to bring a backup heater!
How to Rescue
-
Amine blush (greasy film): Wash surface with warm water and dish soap. Dry. Sand lightly. Apply new coat.
-
Soft cure (cold): Move the piece to a warmer room (25°C). Allow extra 24–48 hours.
-
Cloudy pour: Sand back surface until clear, then recoat.
Pro Tips
-
Always keep a thermometer + hygrometer in your workspace.
-
If humidity is high, run a dehumidifier or work at night when air is drier.
-
Warming your workspace even by 3–4°C can save an entire project.

Epoxy Resin Mistakes #3: Rushing the Mixing Process
Symptom: Streaks, uneven cure, tacky patches.
Why It Happens
Mixing isn’t just stirring—it’s about creating a complete chemical marriage. Stirring too fast whips in bubbles. Stirring too short leaves unreacted parts.
Real Workshop Story
A beginner once added blue pigment before fully mixing resin and hardener. The result? Some areas cured hard and glossy blue, while other areas stayed sticky and transparent. It looked like someone spilled glue on a painting.
How to Fix It
-
Mix resin + hardener for 3–5 minutes minimum.
-
Use the double cup method to guarantee even mixing.
-
Stir slowly, scraping walls and bottom.
-
Add pigment only after resin and hardener are fully blended.
Pro Tips
-
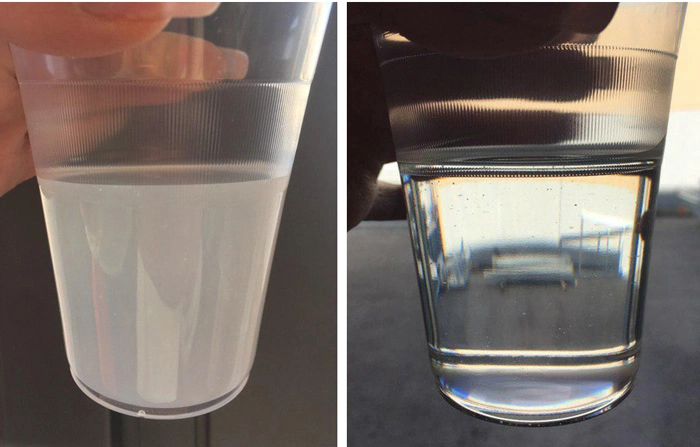
Use a clear plastic cup—you’ll see unmixed streaks clinging to the sides.
-
When in doubt, stir longer, not faster.
Epoxy Resin Mistakes #4: Pouring Too Thick in One Layer
Symptom: Resin overheats, turns yellow, cracks, or traps air inside.
Why It Happens
Epoxy cures via an exothermic reaction (it generates heat). In thin layers, heat escapes. In thick pours, heat builds up like a furnace, speeding the reaction until it spirals out of control.
For regular resin: safe pour depth is 1–2 cm (0.4–0.8 inch). Deep-pour resins are specially formulated for 5–10 cm (2–4 inches).
Real Workshop Story
A student once tried pouring a 5 cm layer with regular tabletop epoxy. Within an hour, smoke started rising, the surface bubbled, and the center cracked like desert soil. The wood slab was scorched beyond repair.
How to Rescue
-
If you see overheating: quickly spread resin into shallow trays to release heat.
-
Sand out cracks and bubbles, then repour in thinner layers.
-
For deep projects, always buy deep-pour epoxy designed for it.
Pro Tips
-
Use a laser thermometer to monitor surface heat.
-
Don’t pour more than manufacturer’s max depth.
-
Large projects? Pour in multiple layers, waiting until the previous layer is firm but still tacky.

Epoxy Resin Mistakes #5: Skipping Surface Preparation
Symptom: Epoxy delaminates, peels, or forms “fisheyes.”
Why It Happens
Epoxy doesn’t bond to dirt, grease, or oil. Even natural oils in woods like walnut or teak can prevent adhesion. Without proper prep, your shiny finish will literally peel off.
Real Workshop Story
A student once poured resin over a raw, oily walnut slab. The resin pulled away, forming dozens of fisheyes—tiny craters where the surface rejected the epoxy. After sanding and sealing, the second attempt worked beautifully.
How to Fix It
-
Sand surface with 120–220 grit for tooth.
-
Wipe with isopropyl alcohol (IPA), not acetone.
-
For porous wood, apply a thin seal coat before flood coat.
Pro Tips
-
Always vacuum dust before sealing.
-
Test a small area before committing to a large pour.

Frequently Asked Questions (FAQ) about Epoxy Resin Mistakes
Why didn’t my epoxy harden?
Most often: wrong ratio, cold environment, or expired resin.
How do I fix sticky epoxy?
Thin sticky layer: wipe with acetone, sand, recoat. Thick soft resin: remove, repour.
What is amine blush?
A greasy/waxy film from curing in high humidity. Wash with warm water + soap, dry, sand, recoat.
Can I pour epoxy thicker than 1 inch?
Only with deep-pour systems. Otherwise, pour in layers.
Why is my epoxy cloudy?
Usually moisture trapped in resin or surface dust. Sand and recoat.
How do I stop bubbles?
Seal coat first, pour slowly, use a heat gun or torch lightly.
How long does epoxy last in storage?
Typically 1 year unopened, 6–12 months after opening. Always check for yellowing.
Key Takeaways
-
Success with epoxy is 80% preparation: ratios, environment, and surface prep.
-
Mistakes are normal, even for professionals—but every mistake can be a learning experience.
-
With the right knowledge, you can rescue most projects instead of throwing them away.
Final Words: Conquer Mistakes with Knowledge
As we’ve seen, the most common epoxy resin mistakes are not about bad luck; they are entirely preventable. Resin is not a magical substance; it’s a chemical that follows predictable rules. By understanding these rules and respecting the process, you will move from being a “user” of resin to a “master” of it. This is the path of the Resourceful Artisan.
Your Next Step to Becoming an Expert
This article was your first step toward a deeper understanding. If you’re ready to continue your journey and become a confident, masterful artist, I invite you to subscribe to the Epoxy Rescue newsletter. You’ll get our latest tutorials, advanced techniques, and troubleshooting guides delivered directly to your inbox, helping you master the principles of this incredible art form.
2 thoughts on “5 Critical Epoxy Resin Mistakes That Waste Time & Money (A Master’s Guide)”